This page may contain affiliate links, including products featured through creator collaborations. As an Amazon Associate and affiliate partner, Routine, Revised may earn from qualifying purchases.
How to Install a Drywall Anchor
Sometimes there isn’t a wall stud exactly where you want to hang something. That’s when a drywall anchor becomes useful.
A drywall anchor helps distribute weight so that screws can hold items securely even when they are placed in drywall instead of a wooden stud.
Drywall anchors are commonly used for hanging:
- picture frames
- mirrors
- shelves
- towel bars
- small wall décor
They are simple to install and can make a big difference in keeping items safely attached to the wall.
Step 1: Decide if You Need an Anchor
Before installing an anchor, check whether you can attach your item directly to a wall stud.
A stud provides the strongest support for heavier items.
If you are unsure where the studs are located, you can use a stud finder to locate them inside the wall.
If the stud is not in the right position for your item, a drywall anchor can provide the support you need.
Step 2: Choose the Right Anchor
There are several types of drywall anchors. The most common for everyday household use are:
- plastic expansion anchors
- self-drilling anchors
- toggle anchors for heavier items
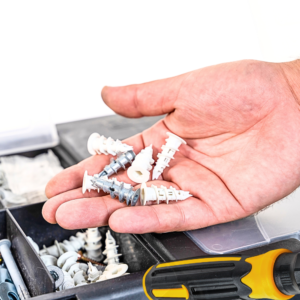
Drywall Anchor Kit
A drywall anchor kit helps securely hang shelves, mirrors, and wall décor when a wall stud isn’t available.
Why it works:
 Keeps common wall-hanging projects simple and secure.
Most small household items can be supported by standard plastic anchors.
Always check the weight rating listed on the anchor packaging before installing.
Step 3: Mark the Spot
Use a pencil to mark exactly where the screw should go.
If you are hanging something that needs to be level, a small level can help make sure the marks are even before drilling.
Taking a moment to measure and mark carefully helps avoid extra holes in the wall.
Step 4: Drill the Hole
Using a drill or screwdriver, create a hole in the drywall at the marked location.

Cordless Drill
A cordless drill makes it easy to install anchors, drive screws, and handle many everyday home projects.
Why it works:
One of the most useful tools to keep in a basic home toolbox.
For plastic anchors, the hole should be slightly smaller than the anchor itself so it fits snugly.
If you are using a self-drilling anchor, it can usually be driven directly into the wall without pre-drilling.
Step 5: Insert the Anchor
Push the anchor into the hole until it sits flush with the wall surface.
If it is tight, gently tap it with a hammer until it is fully seated.
The anchor should sit flat against the wall.
Step 6: Install the Screw
Place the screw through the item you are hanging and drive it into the anchor.
As the screw tightens, the anchor expands behind the drywall and grips the wall securely.
Tighten until the item feels stable, but avoid overtightening.
A Simple Tool That Makes Hanging Easier
Drywall anchors are a simple solution when a wall stud isn’t available where you need it.
They allow you to hang everyday items safely while protecting the drywall from damage.
When combined with a few basic tools — like a drill, level, and stud finder — they make common household projects much easier to handle.
Related Guides
If you’re setting up a small toolkit for home projects, these guides may also help:
• Basic Home Toolbox
• How to Use a Stud Finder
These simple tools cover many everyday repairs and small projects around the house.
Gigi Says
Sometimes the right tool is simply the one that keeps a small project from becoming a bigger repair later.