This page may contain affiliate links. As an Amazon Associate and affiliate partner, The Routine Revised earns from qualifying purchases.
No-Drill Shelf Brackets: A Simple Way to Add Storage Without Tools
Sometimes you just need a little more space — not a full renovation or a toolbox, just a simple place to set a few things.
Adhesive shelf brackets are one of those small solutions. They allow you to add a light shelf without drilling into walls, which makes them especially useful for rentals, quick updates, or areas where you want to keep things simple.
When These Are Helpful
Adhesive shelf brackets are useful when you want to add a small amount of storage without drilling into walls or cabinets.
They can be especially helpful for:
• rental spaces where drilling isn’t ideal
• quick storage updates without tools
• narrow or hard-to-reach areas
• adding a small shelf where traditional brackets would be difficult to install
They’re designed for simple improvements rather than heavy-duty shelving.
What To Expect
Most adhesive shelf brackets are designed to be simple and quick to install.
They typically include:
• peel-and-stick adhesive backing
• a flat bracket support for a shelf
• recommended weight guidelines
Installation usually takes only a few minutes.
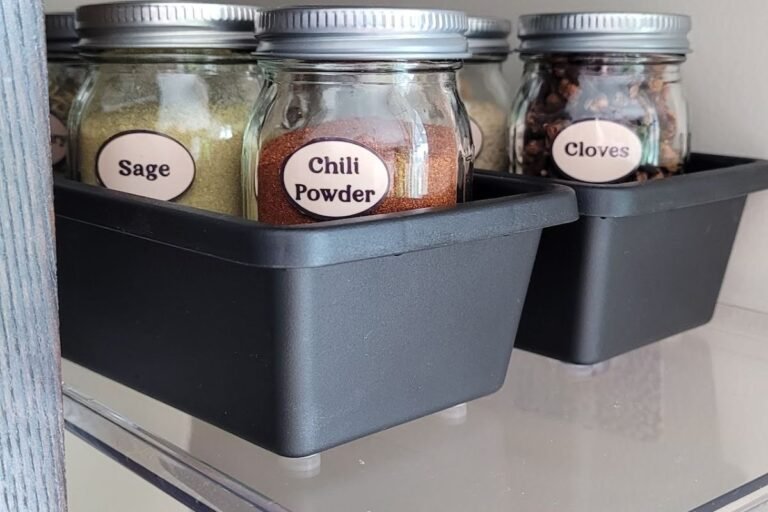
Adhesive shelf brackets supporting a small cabinet shelf used for spice storage.
How To Install Adhesive Shelf Brackets
- Clean the wall surface and allow it to dry completely.
- Peel the backing from the adhesive pad.
- Press the adhesive-backed holder firmly against the wall surface.
- Hold steady pressure for about 20–30 seconds.
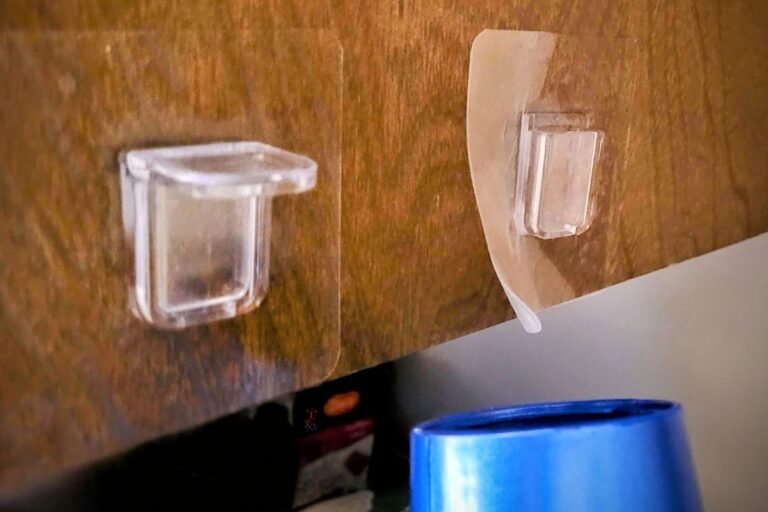
- Insert the plastic bracket into the adhesive-backed holder.
- Allow the adhesive time to set before placing the shelf on the brackets.
Taking a moment to press firmly and letting the adhesive set properly helps the brackets hold better.
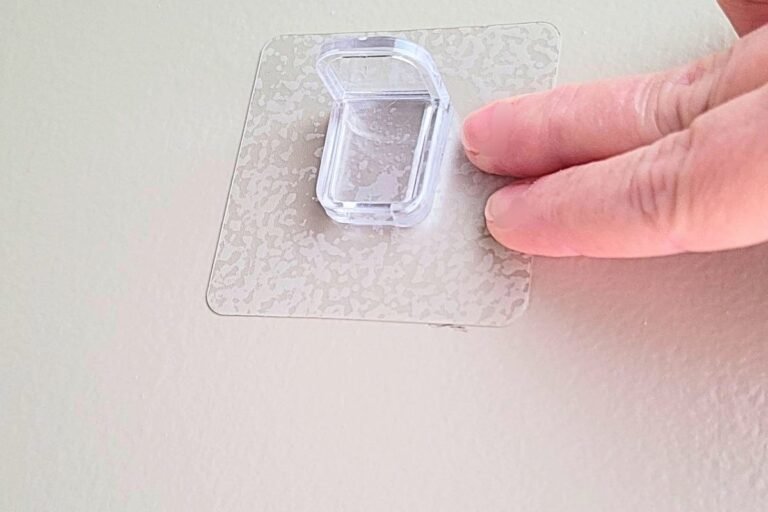
Press the bracket firmly against a clean surface to secure the adhesive.
What They’re Best For
Adhesive shelf brackets are best suited for lightweight shelves and everyday items.
Examples include:
• small jars or containers
• toiletries in a bathroom
• a small plant or decorative item
• folded cloths or hand towels
For heavier storage, traditional mounted shelving is usually the better option.
Helpful for Tight Spaces
One place these brackets can be especially useful is in narrow or hard-to-reach areas.
In this case, the shelf was installed in an approximately 8-inch gap between a cabinet and the wall, where using a drill would have been very difficult. The adhesive brackets made it possible to install a small shelf in that space without tools.
Situations like this are where peel-and-stick brackets can be particularly practical — when traditional installation simply isn’t convenient.
What To Keep In Mind
A few simple things can help adhesive brackets perform better:
• smooth, clean surfaces work best
• follow the recommended weight limits
• allow time for the adhesive to fully set
• avoid placing heavy objects on the shelf
They are meant to provide a quick and practical solution, not replace permanent shelving.
How To Remove Adhesive Shelf Brackets
If you ever need to remove the brackets later, gentle heat can help soften the adhesive.
During testing, a hair dryer set to warm was used to loosen the adhesive on a stained wood kitchen cabinet. The bracket released cleanly without damaging the finish.
Painted walls and surfaces can vary, so it’s a good idea to:
• apply heat slowly
• pull gently rather than forcing the bracket off
• test in a small area first
Taking a moment to soften the adhesive can make removal much easier.
Gentle heat from a hair dryer can help loosen adhesive when removing brackets.
Worth Having
A simple solution when you need a bit of extra space without drilling holes or using tools.
Gigi Says
It doesn’t have to be complicated to make a space work better.
Sometimes it’s just a small adjustment in the right place.